Transaction entry in Microsoft Dynamics GP (Great Plains) Payables Management
You can use Payables Management in Microsoft Dynamics GP (Great Plains) to enter, post and track invoices, credit memos and similar vendor documents.
To enter a Payables Transaction in GP:
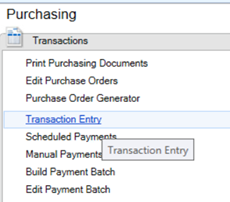
1. From Purchasing / Transactions, open Transaction Entry.
2. Your Voucher Number will default and auto populate. (Note – This is a unique system generated number and is NOT the invoice number provided by the Vendor. It is recommended that you do not change this number.)
3. CLICK in the Batch ID field and enter a Batch ID: We recommend that this be a specific identifier, such as initials of the user and date. EX: RC08242022
After entering the Batch ID, Tab
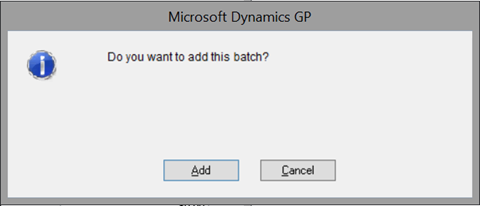
The system will ask if you want to add the batch.
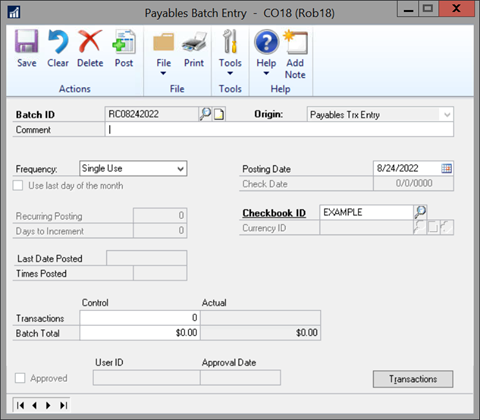
4. Click Add and add your batch in the batch entry window that will come up.
- Comment: You can add a description or comment about your batch in this field.
- Frequency: Select the frequency of your batch. For example, we are using a single use batch.
- Posting Date: This date can be changed. The system should automatically default to the current date. **NOTE: You cannot enter a posting date for a batch that is in a prior period if that period is closed!
- Select the checkbook ID
- Control totals are only required when Batch Approval is required based on your Payables setup.
- SAVE the batch
5. Enter a Doc. Date for your transaction. This is usually the invoice date of the transaction you are entering.
6. Enter a description for your invoice if needed.
7. Select your vendor and update or fill in the invoice information: document number, PO number if necessary. (Some information will default from the Vendor)
8. Enter your invoice amounts:
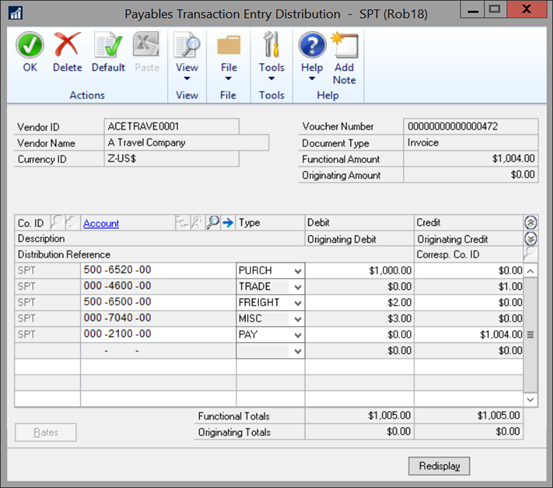
9. Click on DISTRIBUTIONS and enter or check your GL accounts. Ensure the sum of the amounts by Type on the Transaction Entry Distributions window match the invoice amounts from Transaction Entry window, for example:
-
- PURCH = Purchases
- TRADE = Trade Discount
- PAY = On Account
10. Click OK
11. Verify your entry looks correct
12. Select SAVE.
13. Continue entering transactions to your batch until you are done. The next default voucher number will automatically come up.
If you need additional assistance, then get in touch with our support team

