

How set up Bank Reconciliation in Microsoft Dynamics GP (Part 1 of 2)
The Bank Reconciliation module in Microsoft Dynamics GP (formerly known as Great Plains) receives information:
- from payments posted in the Payables/Purchasing module
- from receipts posted in the Receivables/Sales module
- based on Checkbook ID
- to update the Checkbook Register associated with the Checkbook ID.
Bank Reconciliation also helps to complete the following tasks
- Control reconciliation processes by creating default settings and choosing between transaction types, including checks, receipts and adjustments
- Begin reconciling one checkbook before finishing the reconcile process in a different checkbook
- View details needed to reconcile, including deposit number, transaction number, type, payment amount, and description
You can use Bank Reconciliation to enter and maintain checkbooks used to pay vendors, employees, distribute petty cash, and to reconcile bank statements. If you’re using Payables Management and Payroll, checks printed and posted from those modules update checkbooks in Bank Reconciliation.
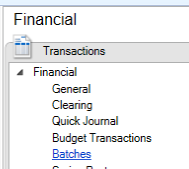
Bank Reconciliation transactions feed the General Ledger, similar to Payables/Purchasing and Receivables/Sales modules. Posting a transaction to a cash account does not necessarily update the Bank Reconciliation/Checkbook Register. All Bank Reconciliation transactions and access are located in the Financial Module under Transactions.

In Part 1 of this series, we will cover:
- Bank Deposits
- Bank Transactions
Bank Deposits
Bank Deposits do not update the General Ledger, rather the Cash Receipt updates the General Ledger. The Cash Receipt can also have a different date than the deposit, and it is important to note that a difference between the Cash Receipt Date and the Deposit Date will create a timing difference in the Checkbook Register and the General Ledger Account Balances.
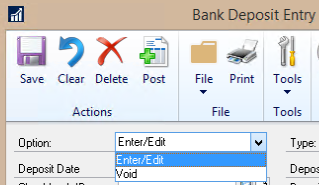
All deposits require the OPTION and TYPE field to be selected. You can either Enter/Edit a deposit, or Void a deposit.
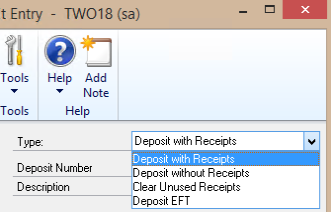
- Use Deposit with Receipts to enter a deposit for receipts that were posted in Bank Reconciliation, or from Sales/Receivables Management.
- Use Deposit without Receipts to enter a deposit without assigning receipts. Note: This will not update the General Ledger Cash Account.
- Use Deposit to Clear Receipts to remove a receipt from the list of receipts available for deposit. Use sparingly, only when you are sure the Receipt has already been accounted for in the Bank Reconciliation Module.
- Use Void Deposit to remove deposits that were entered and posted incorrectly.
Deposits with Receipts
- Groups receipts together into a deposit amount.
- A receipt can be created as a Cash Receipt in the Sales/Receivables Module, or as a Bank Transaction.
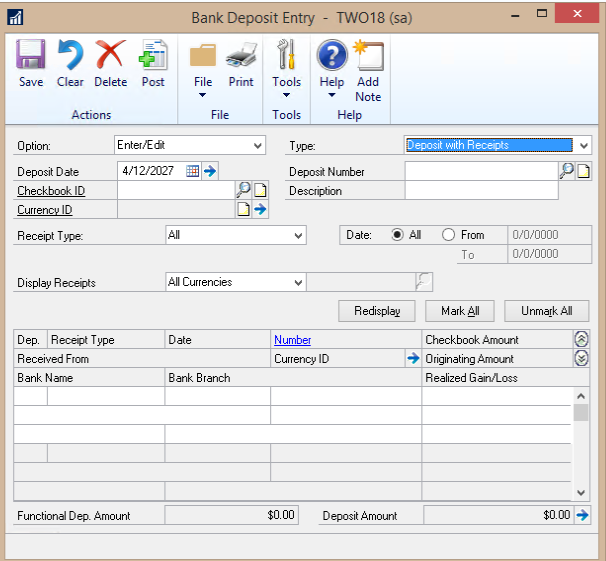
- Enter your transaction
- Checkbook ID – Select the Checkbook you are entering deposits for.
- Deposit Number will automatically populate with the next number. Best practice is to use the automatically generated number.
- Description – Description for deposit.
- If desired, restrict the receipts that will be displayed to be selected in the Deposit:
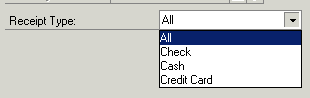
- Receipt Type – Select All, Check, Cash or Credit Card
- Date – Select All or a date range

- Once selections are made – Click Redisplay

- Receipt Type – Select All, Check, Cash or Credit Card
- Select Receipts that were part of the deposit by checking the Dep. Box. The following information about the receipts is shown:
- Receipt Type – Check, Cash, Credit Card
- Date – date of the Receipt
- Number – Document Number for Receipt, highlight and click link to see more information.
- Checkbook Amount – amount in the currency assigned to Checkbook
- Received From – shows cusomter from the Cash Receipt or Received From field from the Bank Transaction Entry window.
- Currency ID – from receipt if using multicurrency
- Originating Amount – in the currency of original receipt if using multicurrency
- Realized Gain/Loss – due to difference in exchange rate between receipt date and deposit date.
- Functional Dep. Amount – if using multicurrency, shows currency equivalent of deposit amount.
- Deposit Amount – Deposit Total of marked receipts.

Once you have selected the receipts you want in your deposit, you can either save, clear, delete or post the deposit.

- Save – can only save one deposit per checkbook at a time
- Clear – clears the entries made and continue working in the window.
- Delete – deletes the deposit just entered. Receipts unmarked automatically.
- Post – post the deposit (doesn’t post until you close the window)
Deposits without Receipts
You can enter a lump sum deposit without assigning receipts (not a best practice).
- Processed clear receipts – if you don’t want to associate individual receipts with a deposit.
- You still need to enter the amount of deposit(s) for receipts cleared.
- This process does not update the General Ledger.
The process is the same as Deposits with receipts, except you need to enter the deposit amount.

Void a deposit
To void a deposit that has been entered, open the Bank Deposits window, and select VOID in the Option field. Select the receipt you want to void, and click Void. The deposit will not be voided until you close the window.
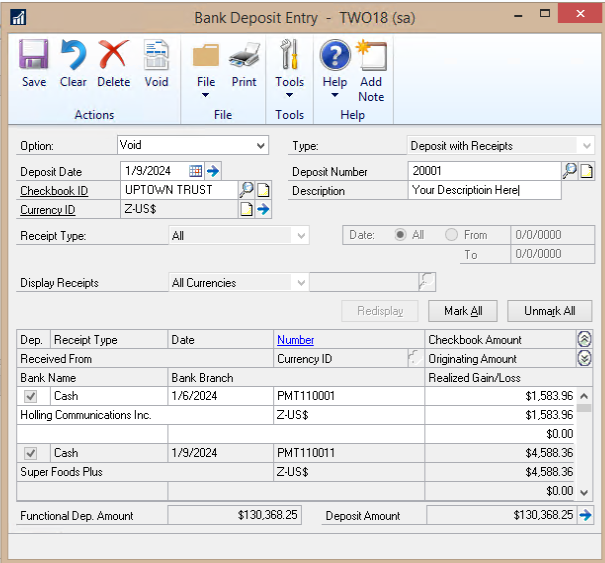
Voiding a deposit will unselect the receipts they are associated with. The example above will open the payments received from the customers for $1,583.96 and $4,588.36 to be selected in a different deposit.
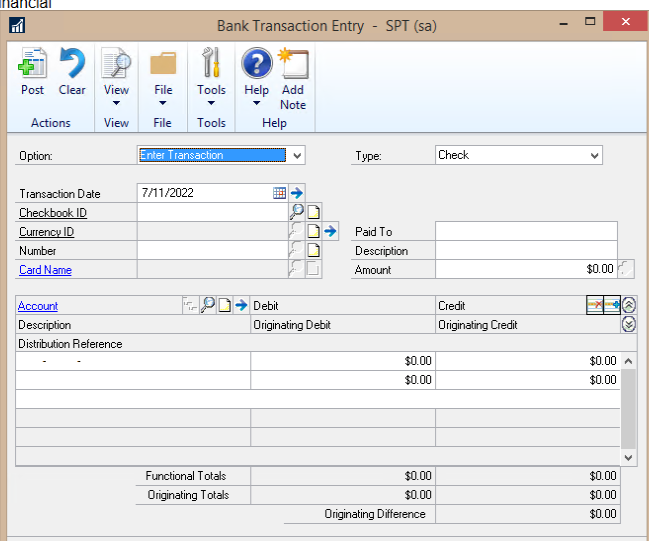
Bank Transactions
Bank Transactions create an entry to update the General Ledger.
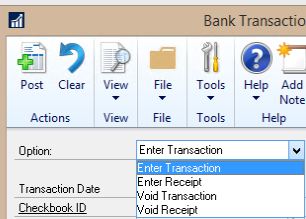
For Enter Transaction – Types are:
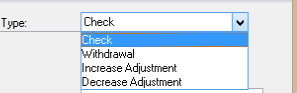
Checks and Withdrawals
- Decrease checkbook balance
- Transactions not associated with a Vendor
Increase/Decrease Adjustments
- Other adjustments (for example, interest income/bank charges)
- Not Customer/Vendor Related
For Enter Receipts – Types are:
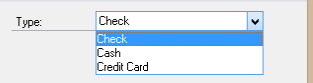
Some Non-Customer Receipts will still have to be associated with a deposit – paid by check, cash, or credit card. Examples are employee reimbursements, vendor reimbursement of overpayment. This follows same process as payment entry and must post the batch created to the GL.
If you need to record a transaction affecting cash that was not part of the regular processing from other subsidiary modules, enter a Bank Reconciliation module transaction; doing so will update the checkbook and send a journal entry to the General Ledger.
After posting the Bank Transaction, check your Batches under Financial. You will then need to post the “CM” batch to update the GL.
- Pull up the batch created by your Bank Transaction Entry.
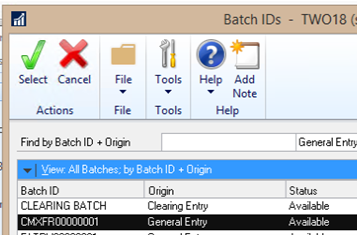
- Post your batch.

In Part 2, we’ll cover Miscellaneous Check, Bank Transfers and Reconcile Bank Statement. If you need additional assistance, then get in touch with our support team!