


Microsoft Dynamics GP (Great Plains) is a very powerful business management tool, providing essential features such as vendor management, and making it easy to enter and post purchase transactions, and track payments. Vendors are the foundation of Payables Management; therefore it is important to maintain information about vendors, and ensure your information is accurate and up to date.
To add a vendor to the system:
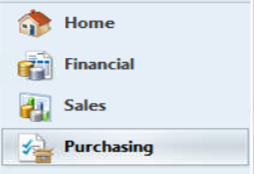
1. Go to the Purchasing Module in GP.
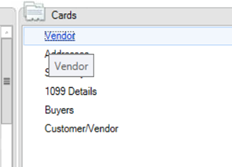
2. Under the Cards option, select Vendor
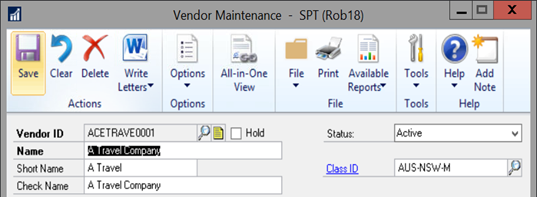
3. In the vendor maintenance window, fill in the vendor information:
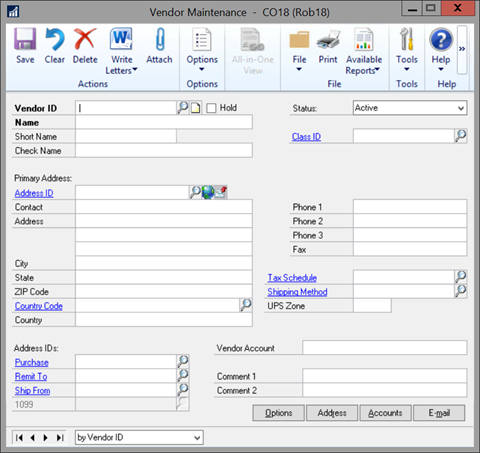
THE FIELDS:
- Vendor ID: This is an assigned ID to identify a vendor. This can be an abbreviation of their name, an internal ID code assigned or a number. For example: Test Company LTD – possible IDs could be TC1234, TESTCO, XET001, etc.
- Name: Type in the vendor’s full name.
- Short Name: This will auto populate
- Check Name: This will auto populate
CLASS ID: The Class ID is a tag you can place on a vendor which will set default values for your vendor. This will enable you to do a mass update to those vendors. Clicking on the Class ID field name on the Vendor Maintenance window, opens the window below.
***NOTE: When you do any updates to the Class ID window, you will be asked if you want to Roll Down the information, which will update the information on all Vendors with this Class ID, including any specific information you may have updated for a specific vendor.
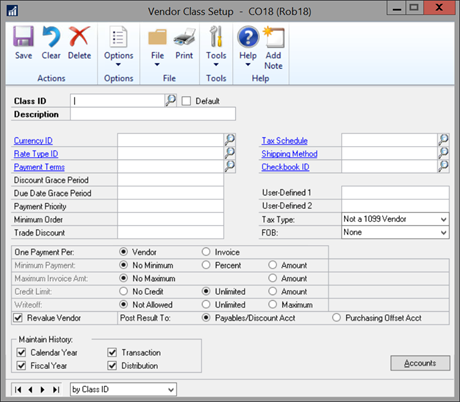
Class IDs can be set up by you to set fields by default for a group of vendors and use in reporting. The example below shows Class IDs set up by country and type of service.
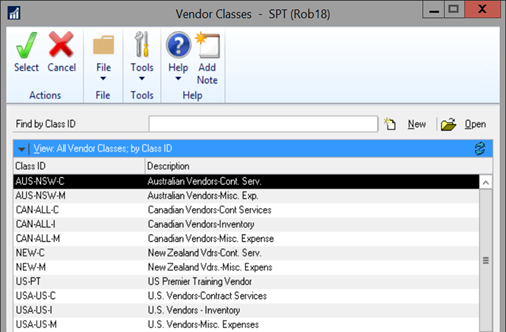
Vendor Class setup includes:
- Class ID: An ID assigned as per your company
- Description: A detailed description of your class ID
- Default: You can check this box if you want this class ID to be your default for new vendors.
- Currency ID: This will be the currency prescribed to your vendor and how they are paid.
- Tax Schedule: Assigns how tax is calculated in a transaction for this class ID.
- Rate Type ID: If you use Multicurrency Management, enter or select the rate type ID that vendors in this class typically use. During transaction entry, the rate type ID you entered for a vendor class – and rolled down to vendors in the class – is the default rate ID in payable transaction entry windows. Click the Rate Type ID link to view more information.
- Shipping Method: Assigns a shipping method for your class ID.
- Payment Terms: Enter payment terms for this class ID.
- Checkbook ID: Select the checkbook for which this vendor class will be paid from.
- Discount Grace Period: You are able to assign a discount grace period.
- Due Date Grace Period: You are able to assign a due date grace period.
- Payment Priority: This is a feature that will let you assign a class ID to pull and pay in a check run first or by priority. 01 would pay before an A1.
- Minimum Order: This is a minimum amount that you are required to meet to place an order with this vendor class – used mostly for inventory class ID’s.
- Trade Discount: You can enter a trade discount here.
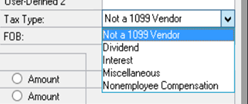
- Tax Type: Choose the tax type that applies to most vendors in the class.
- FOB: Select the default FOB for this class ID.
Minimum Payment, Maximum Invoice Amount, Credit Limits and Writeoff limits can be assigned in this section. These settings default to none or not allowed unless you change them.

- Revalue Vendor: Marks whether you can revalue multicurrency documents for vendors in this class.
- Post Result To: Mark whether to post revaluation amounts to a Payables/Discount account or a Purchasing offset account.
Maintaining your history: You can mark whether to maintain your history on these options. They system defaults to checking all four options.

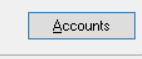
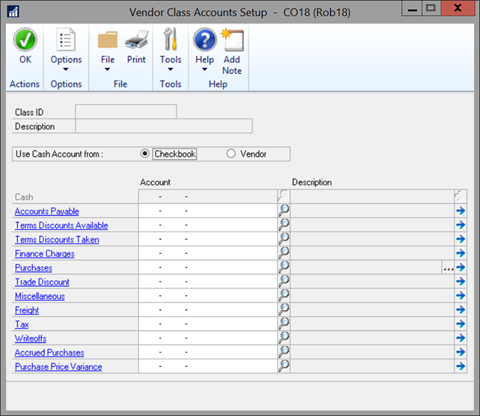
Accounts: You can assign default GL accounts that vendors in this class ID will post to.
Primary Address: Assign an address for your vendor.
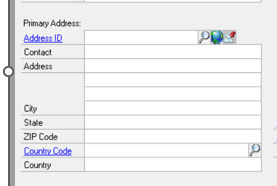
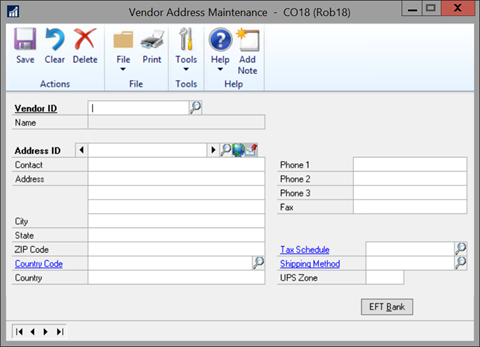
You can assign multiple addresses for your vendor by clicking on the blue Address ID hotlink. This is beneficial if your vendor has a different mailing address, remittance address and/or shipping address. Fill in the Vendor’s address information as well as their phone/contact information.
- Address IDs: Assign an address ID that you created above.
- Vendor Account: You can put your account number with that vendor in this field.
- Comment 1 & 2: Various user information or account information that you wish to include. This is like a “notes” section.

BUTTONS AT BOTTOM:
You can access various information for a vendor from these buttons.
- Options: Change vendor maximums and minimums
- Address: Access the address maintenance window.
- Accounts: Assign specific GL accounts for this vendor.
- E-mail: Set up Email options for the vendor.
4. Click SAVE at the top to save your vendor in the system.
If you need additional assistance, then get in touch with our support team!