


Make budgeting easy with the Microsoft Dynamics Great Plains (GP) integration with Excel. To utilize Budgets in GP which will allow reporting and analysis from within GP and with your GP reporting tools, you can Import and Export your Budget in GP.
Importing/Exporting from Budgets
To Create a Blank Budget from GP
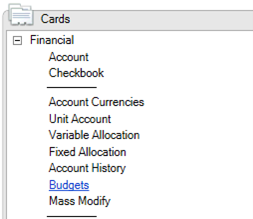
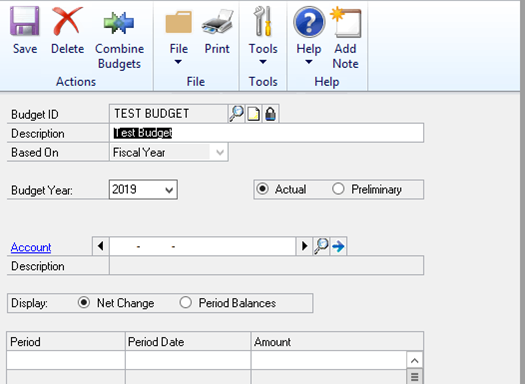
1) Open the budgets window in GP: Financial >> Cards >> Budgets

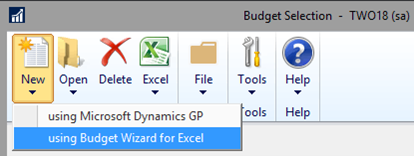
2) Click NEW, and select “using Budget Wizard for Excel”.
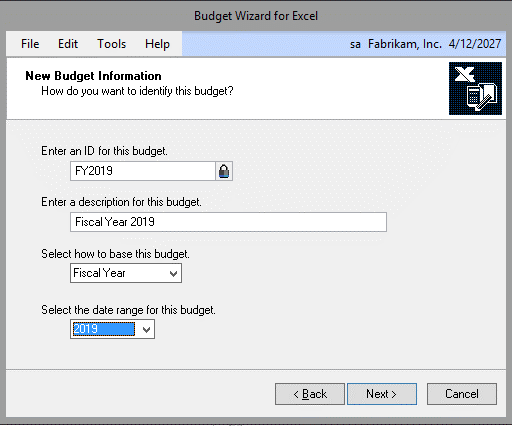
3) This will open the Budget Wizard. Click NEXT:

4) Enter an ID for this budget. Enter a description and select how to base the budge and the date range/year. Click NEXT.
5) Select “BLANK BUDGET”. Click NEXT.

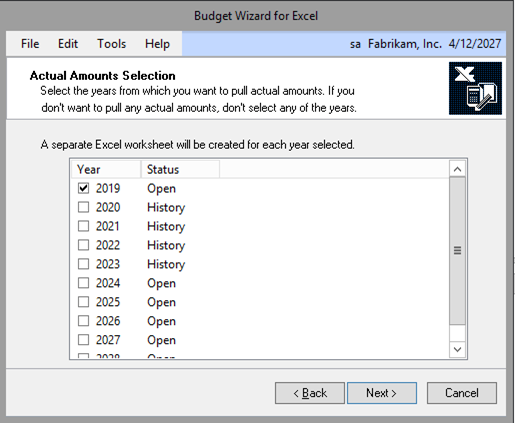
6) Select actual amounts. If you do not want to pull any actual amounts, don’t make a selection in this window. Click NEXT.
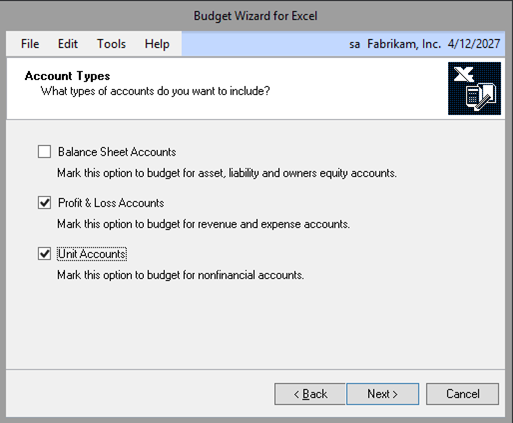
7) Select the account types you want to include. Click NEXT.
8) Select which accounts you want to include from those account types: all or specific accounts.
GP will allow you to be specific in this window. Click NEXT.

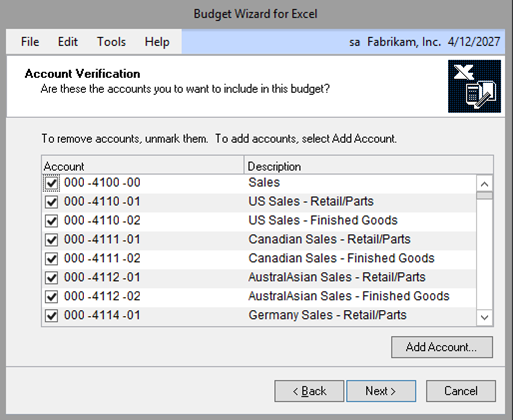
9) Verify the accounts you want to include in your budget.
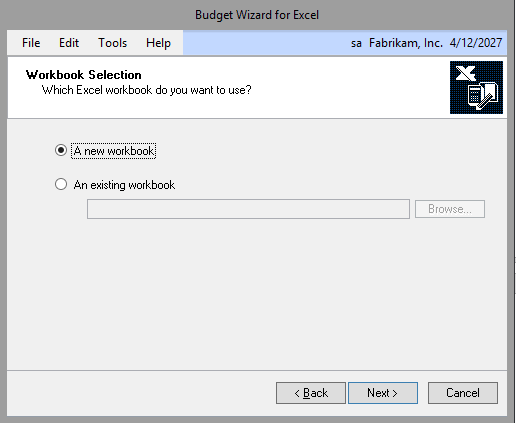
10) Select if you want to use a new workbook, or an existing workbook.
If existing, navigate out to the workbook you want to use. Click NEXT.
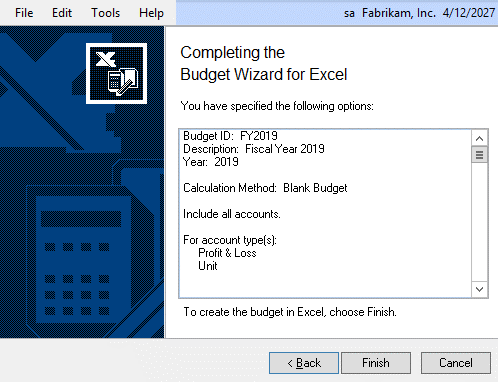
11) GP will give you a snapshot of your options. Verify they are correct. Click FINISH.
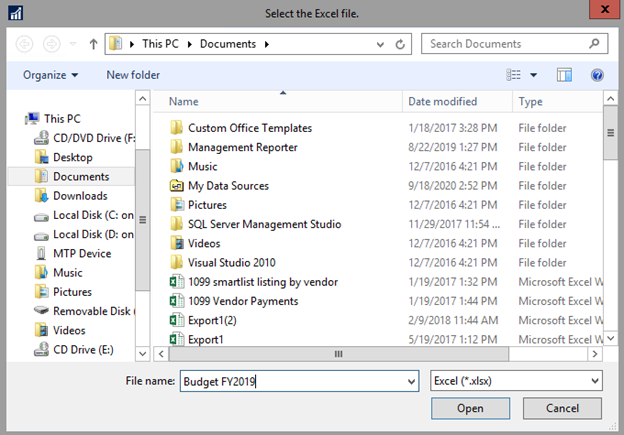
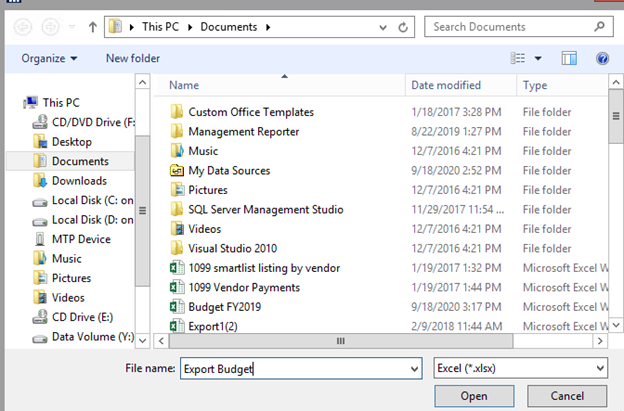
12) The wizard will now have you set up your budget file name. Enter a file name and click OPEN.
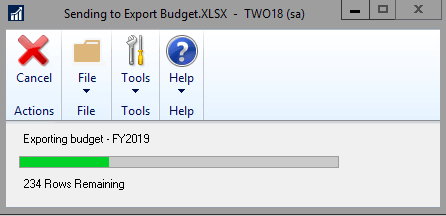
13) GP will now send the file to excel, and it will open when completed.

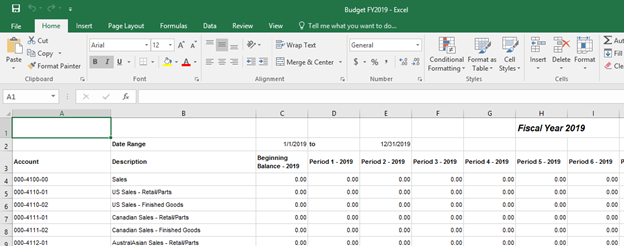
14) Enter your budget information into the blank budget and save the file.
To Export an Existing Budget:
You can export an existing budget that is already created into excel in order to update and re-import to GP.
1) Open the budges window in GP: Financial >> Cards >> Budgets
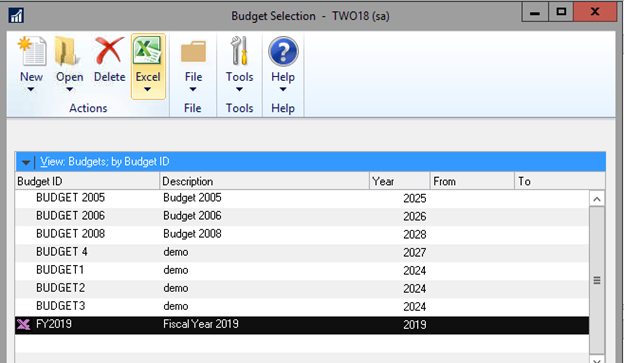
2) Select the budget you want to import from, then click EXCEL.
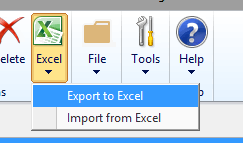
3) Click on Export to Excel.
4) GP will allow you to create this file as a new workbook or select an existing workbook. If exporting to an existing workbook, browse out the file name and select it. Click OK.
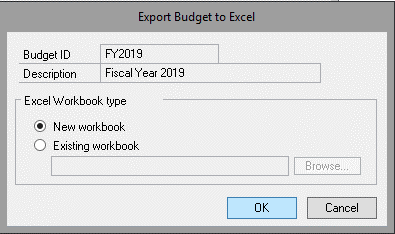
5) Name the new file name if you are creating a new workbook.
6) GP will export the file to your new workbook.
7) Once completed, the spreadsheet will open up. Enter/change your figures for the new budget.

8) Save the file.
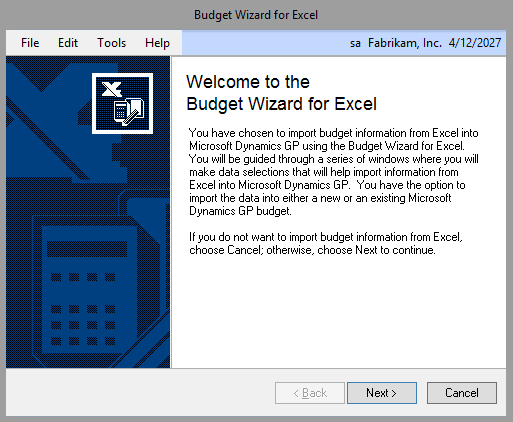
To Import a Budget file into GP:
1) Go back into Financial >> Cards >> Budget. Click on Excel and select IMPORT FROM EXCEL.

10) The budget wizard will open for the import:
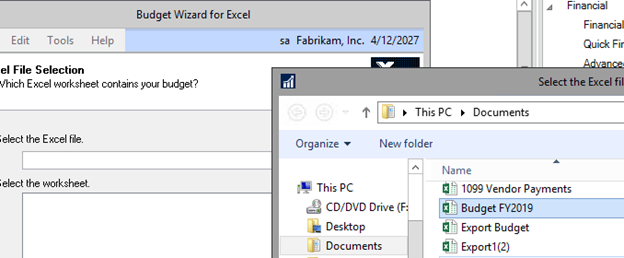
11) Select your option for what type of file you are importing: new or an existing. If existing, search out to find the file. Click NEXT.

12) Enter an ID for the new budget. Fill in a description if needed and select your base and date. Click NEXT.

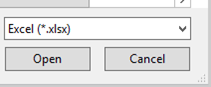
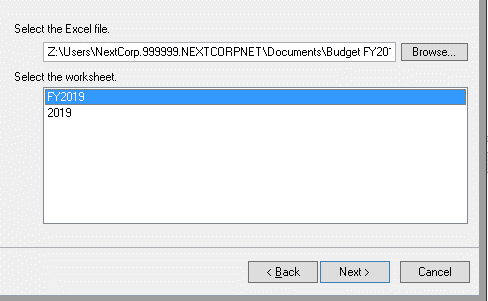
13) Select your file with the new budget information by clicking on BROWSE, then selecting the file and clicking OPEN.
14) GP will ask you to select the worksheet that has your budget information. Highlight and click NEXT.
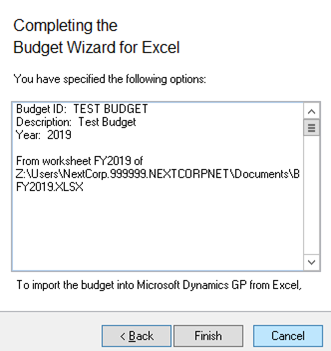
15) The wizard will give you a snapshot of your options to review. If correct, click FINISH.
16) GP will import the file.
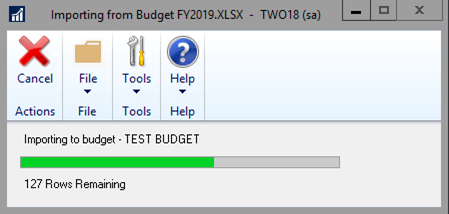
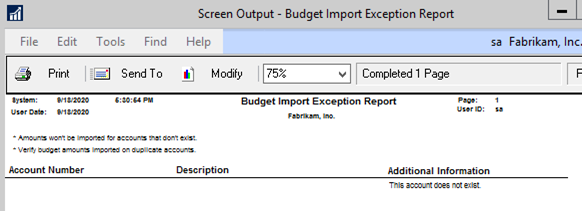
**NOTE: if you have any errors during import, you will receive a prompt to print the Budget Import Exception Report:
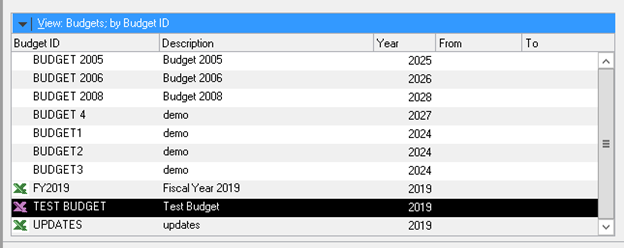
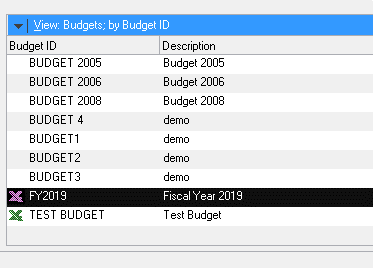
17) Once the file is imported, you will see it in your listing.
TO OPEN YOUR BUDGET:
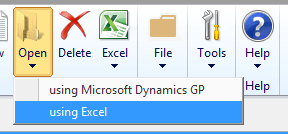
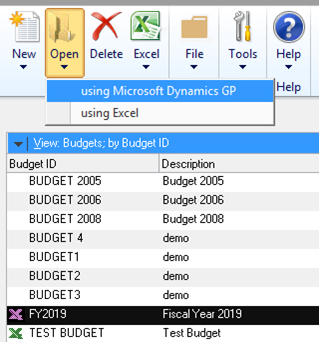
18) Select the budget file you just imported, and click OPEN. You can open in GP or in Excel.
19) In GP, you can select an account within your budget and see your changes/entries.
COMBINING BUDGETS:
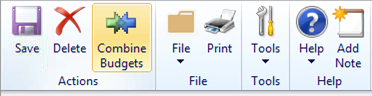
In GP2018, you are able to combine a budget and consolidate into one.
Open the budget you want to combine TO (master):
- Cards >> Financial >> Budgets

- Highlight the budget and click Open and select to open in GP.
- Click “Combine Budgets” in the menu:
- Select the budget ID you wish to combine with the master that is open.

- Click “Process”

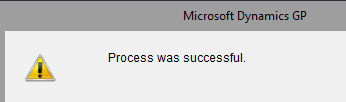
- Close your windows, and you will now see your master budget (FY2019) showing, and the budget that was combined with it (UPDATES) is now gone.
If you need additional assistance, then get in touch with our support team!